


Don’t let the ads fool you, you don’t need a one-tonne pickup to go get some mulch or bring home a new fridge. A crossover can do many towing jobs just fine, from campers to compost, as long as you stay within the limits of the vehicle. For many, that makes your SUV nearly as capable as a pickup.
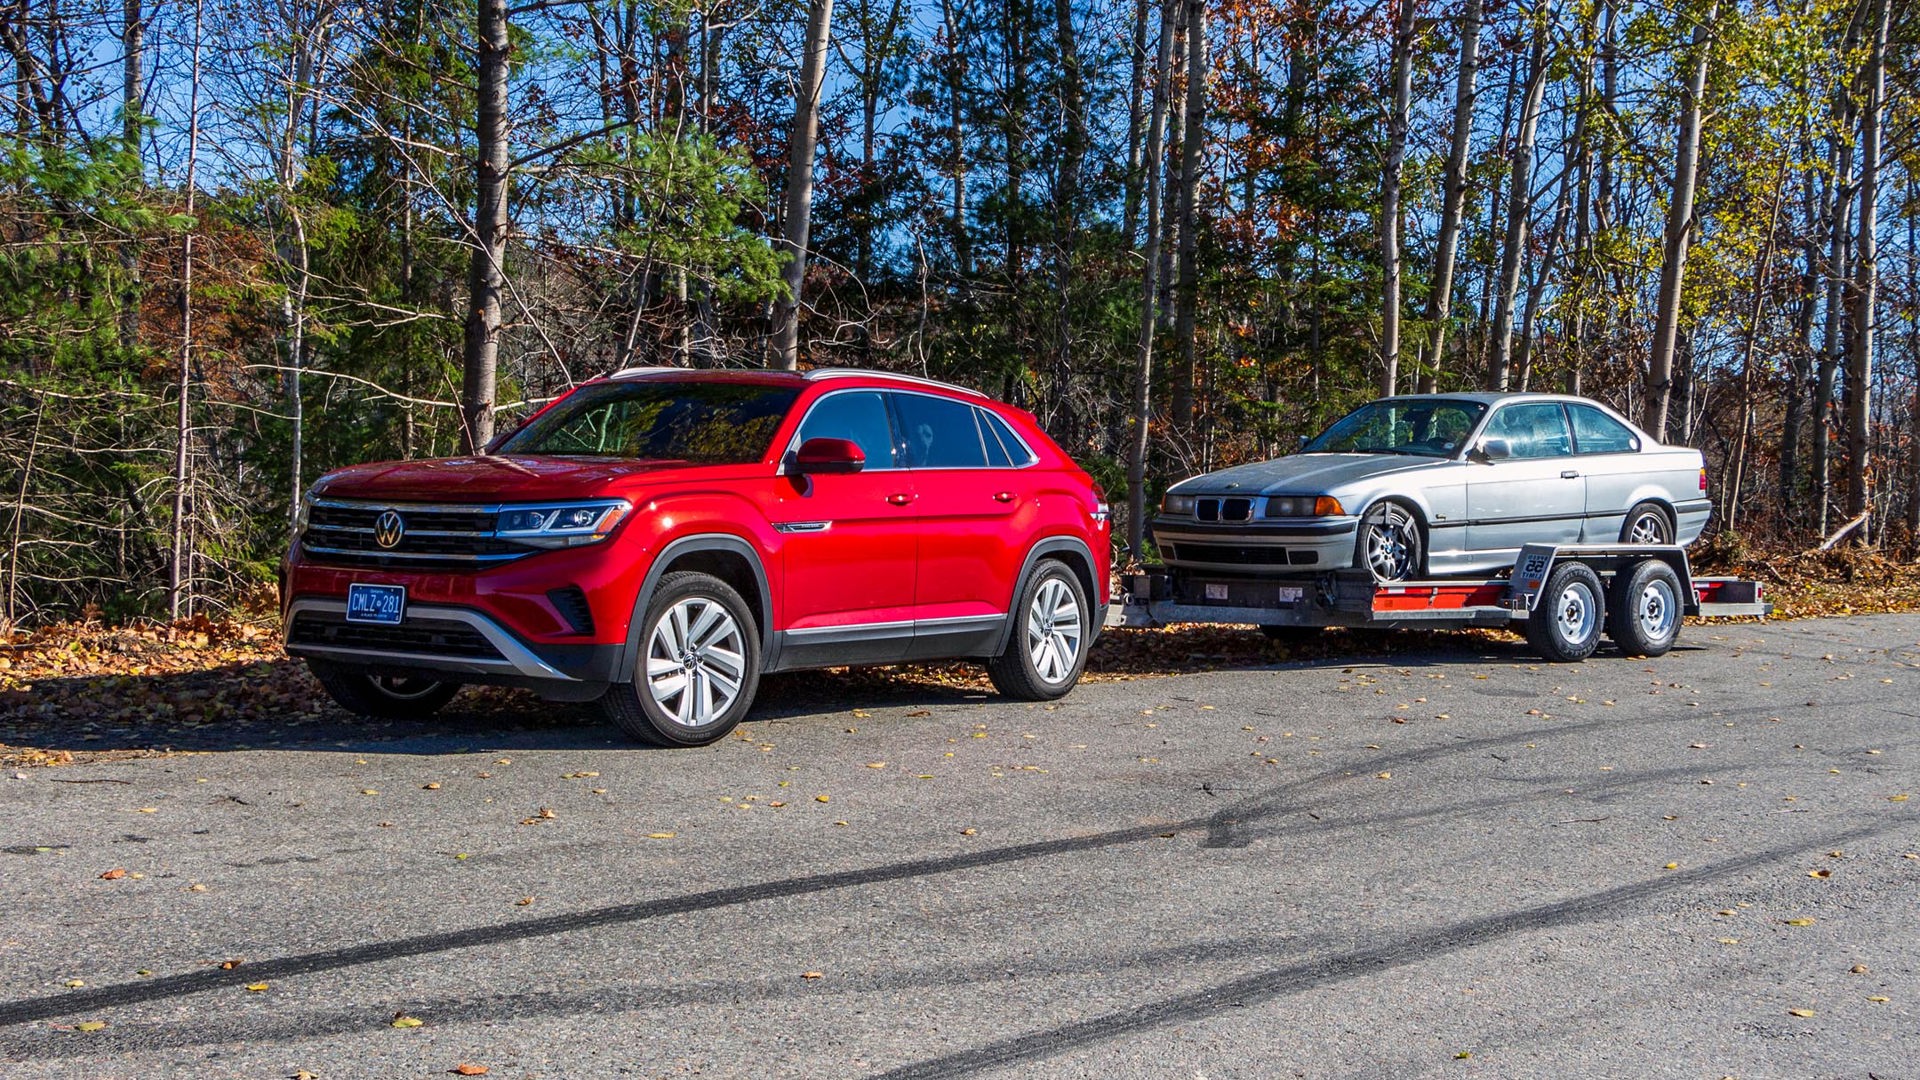
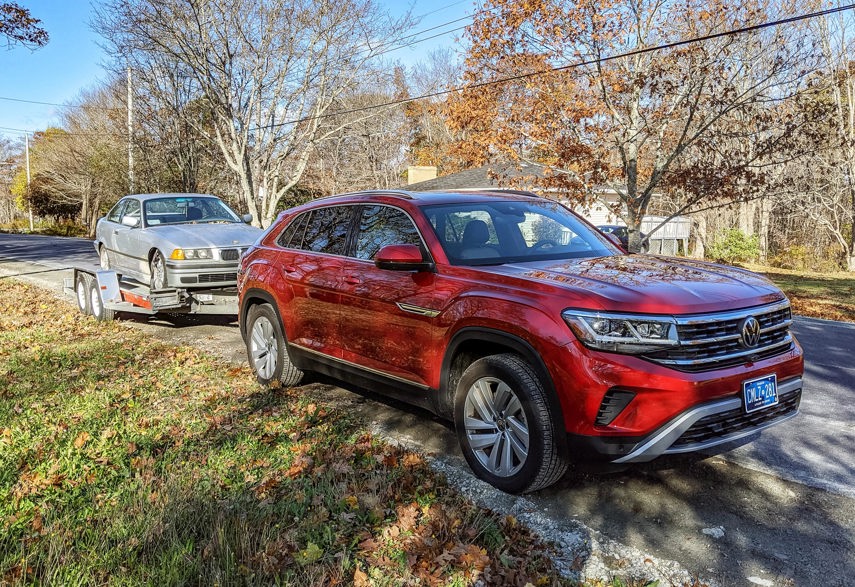
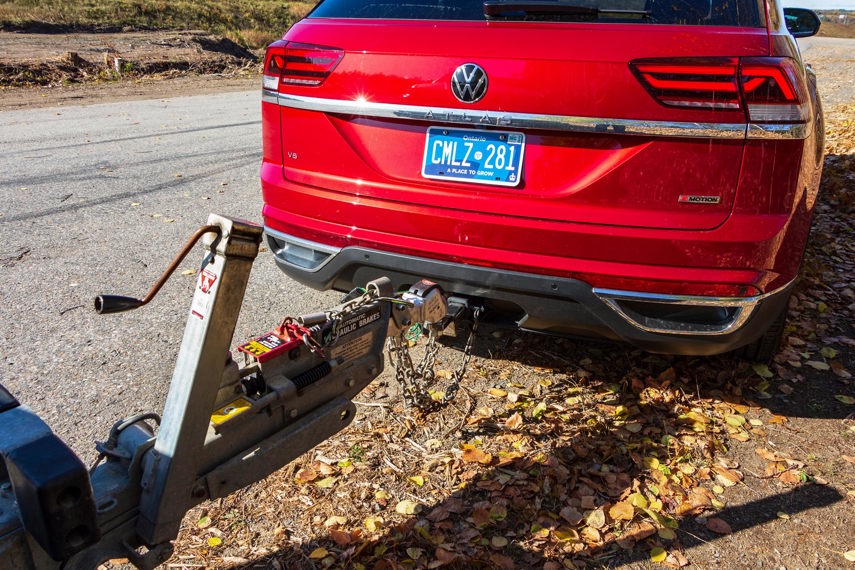
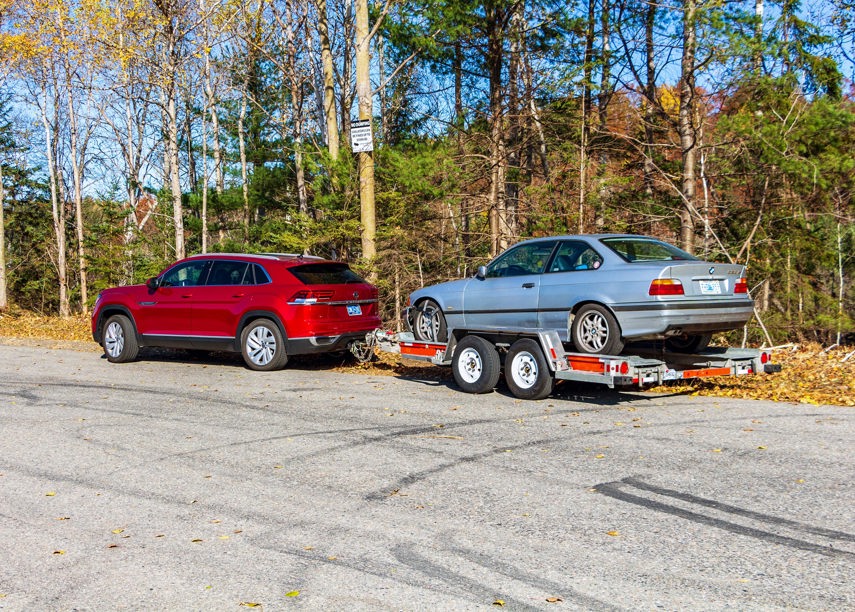
To show you just what a crossover is capable of doing, we went right up to the weight limits of this Volkswagen Atlas Cross Sport and used it to tow a car. Since you’re reading this, you can guess that it went just fine. Here's what you need to know about towing safely with your crossover, and what you need to do it.
Plan Ahead
The most important thing you need to remember is to plan ahead, and that means in every single aspect of the trip, even before you get into your vehicle and start the engine. You need to do most of these things with a pickup, too, but if you’re an occasional tower, it’s even more important. If you have a trailer, start that planning with a check of tire pressures, lights, and wheel bearings. If you’re renting, make sure you have a rental reservation (and good luck if you’re trying to rent one on the last weekend of the month — it's usually moving day for a lot of folks). Plan your route well in advance.
Think ahead with steps like avoiding downtown (if you can), avoiding narrow intersections, and even planning your fuel stops and bathroom breaks. Towing is going to take longer than you think it will, and you don’t want to have to find a bathroom on an unfamiliar off-ramp, and you really don’t want to reverse. Not that it’s impossible – and all of the big-rig truckers reading this are having a laugh at our expense, but that’s OK, they’ve earned it – but because it’s more difficult than driving straight ahead. And we’re trying to help make things easy.
Planning ahead also includes things like making sure you have the right straps to hold down your cargo; you don’t want to use dollar-store straps and cords to hold down your new washer-dryer, for example, and you’ll want a tarp to strap over that load of gravel or mulch if you don’t want to lose half of it and risk a hefty ticket. If you’re renting, you might want to spend a few dollars more for a dolly to make lugging those big items inside less of a chore.
That planning is exactly what I did, renting my car hauler a week ahead of time. A few days before the big day, I made sure I had all of the electrical gear I would need and that my trailer came with the right straps. For me, that meant a new plug and a new adapter, but if you’re really just starting out, it might mean you need to start with a hitch. See below for how to pick out one of those.
It also meant verifying the weight of my cargo and my trailer, making sure I’d be within the limits of my tow vehicle. Especially when it comes to the kind of stuff you tow, cargo can be heavier than you’d guess. A single sheet of drywall can tip the scale at nearly 40 kg, meaning a room’s worth can easily be more weight than a pickup can haul in the bed, and a stack can overload your trailer (and SUV) fast. Same goes for a tractor bucket of dirt. It’s heavy. Remember that it’s cheaper to make a second trip than to pay an insurance deductible. This crossover, car, and trailer combo was within 100 kg or so of the tow limit, but if it can handle this, then smaller projects should be even easier.
The Hookup
Backing up to the trailer isn’t easy, so make good use of that back-up camera or get a friend to help. If your trailer is light and you’re strong, you can just get “close enough” and then muscle the tongue of the trailer in place; otherwise, take it slow and steady. Then crank down the tongue jack and lock the ball.
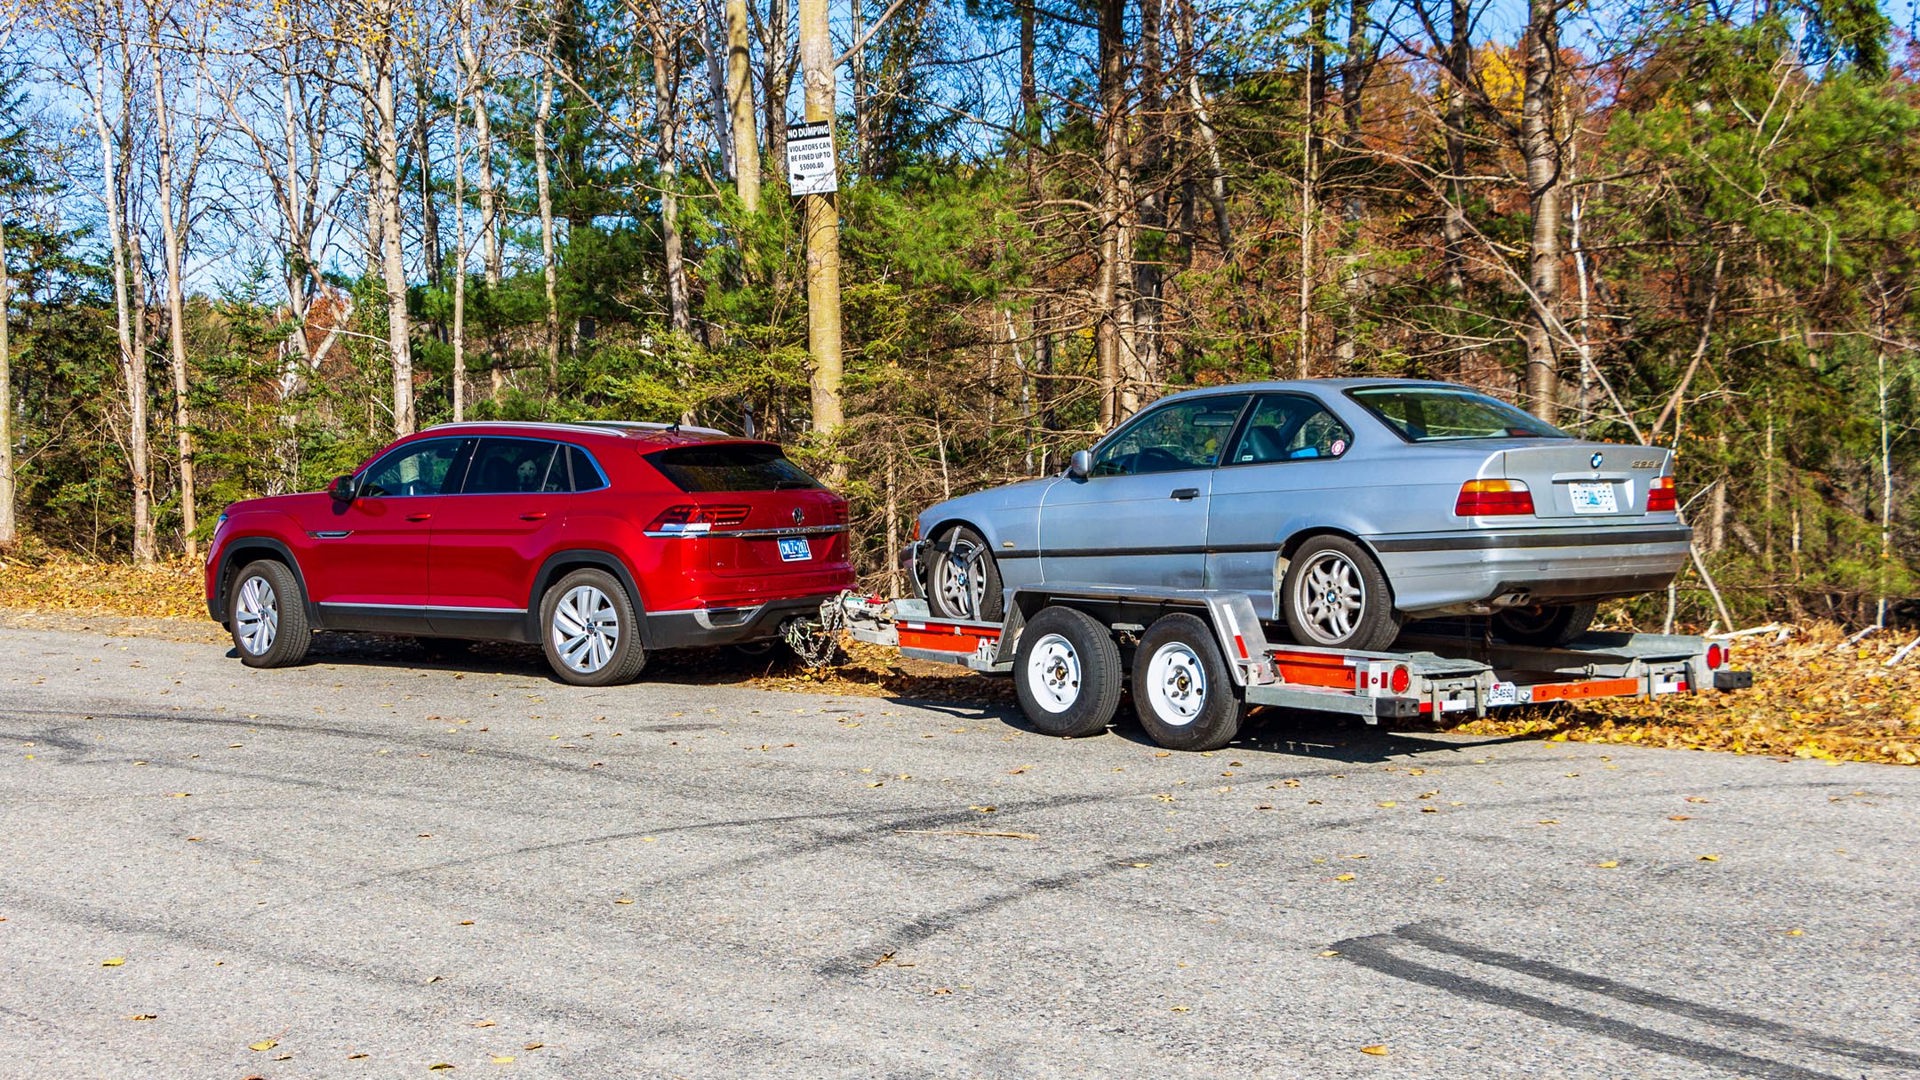
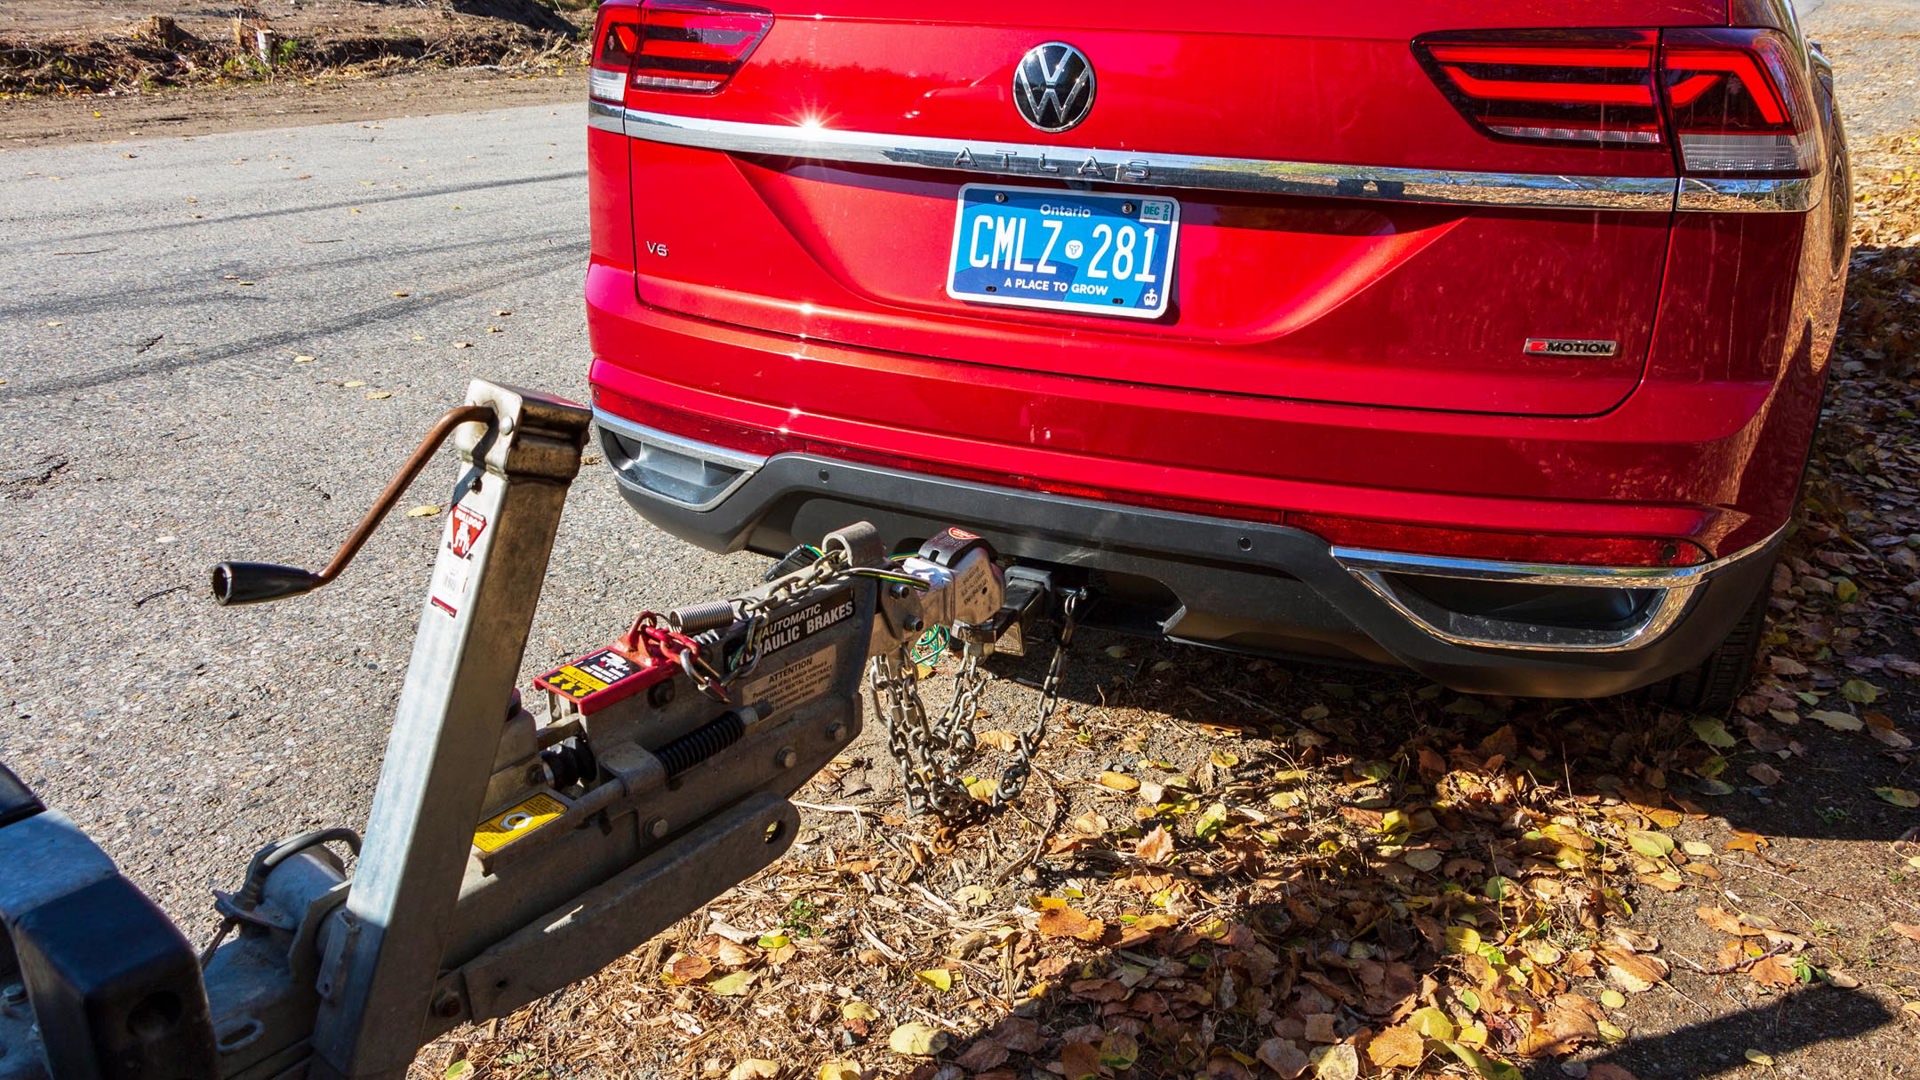
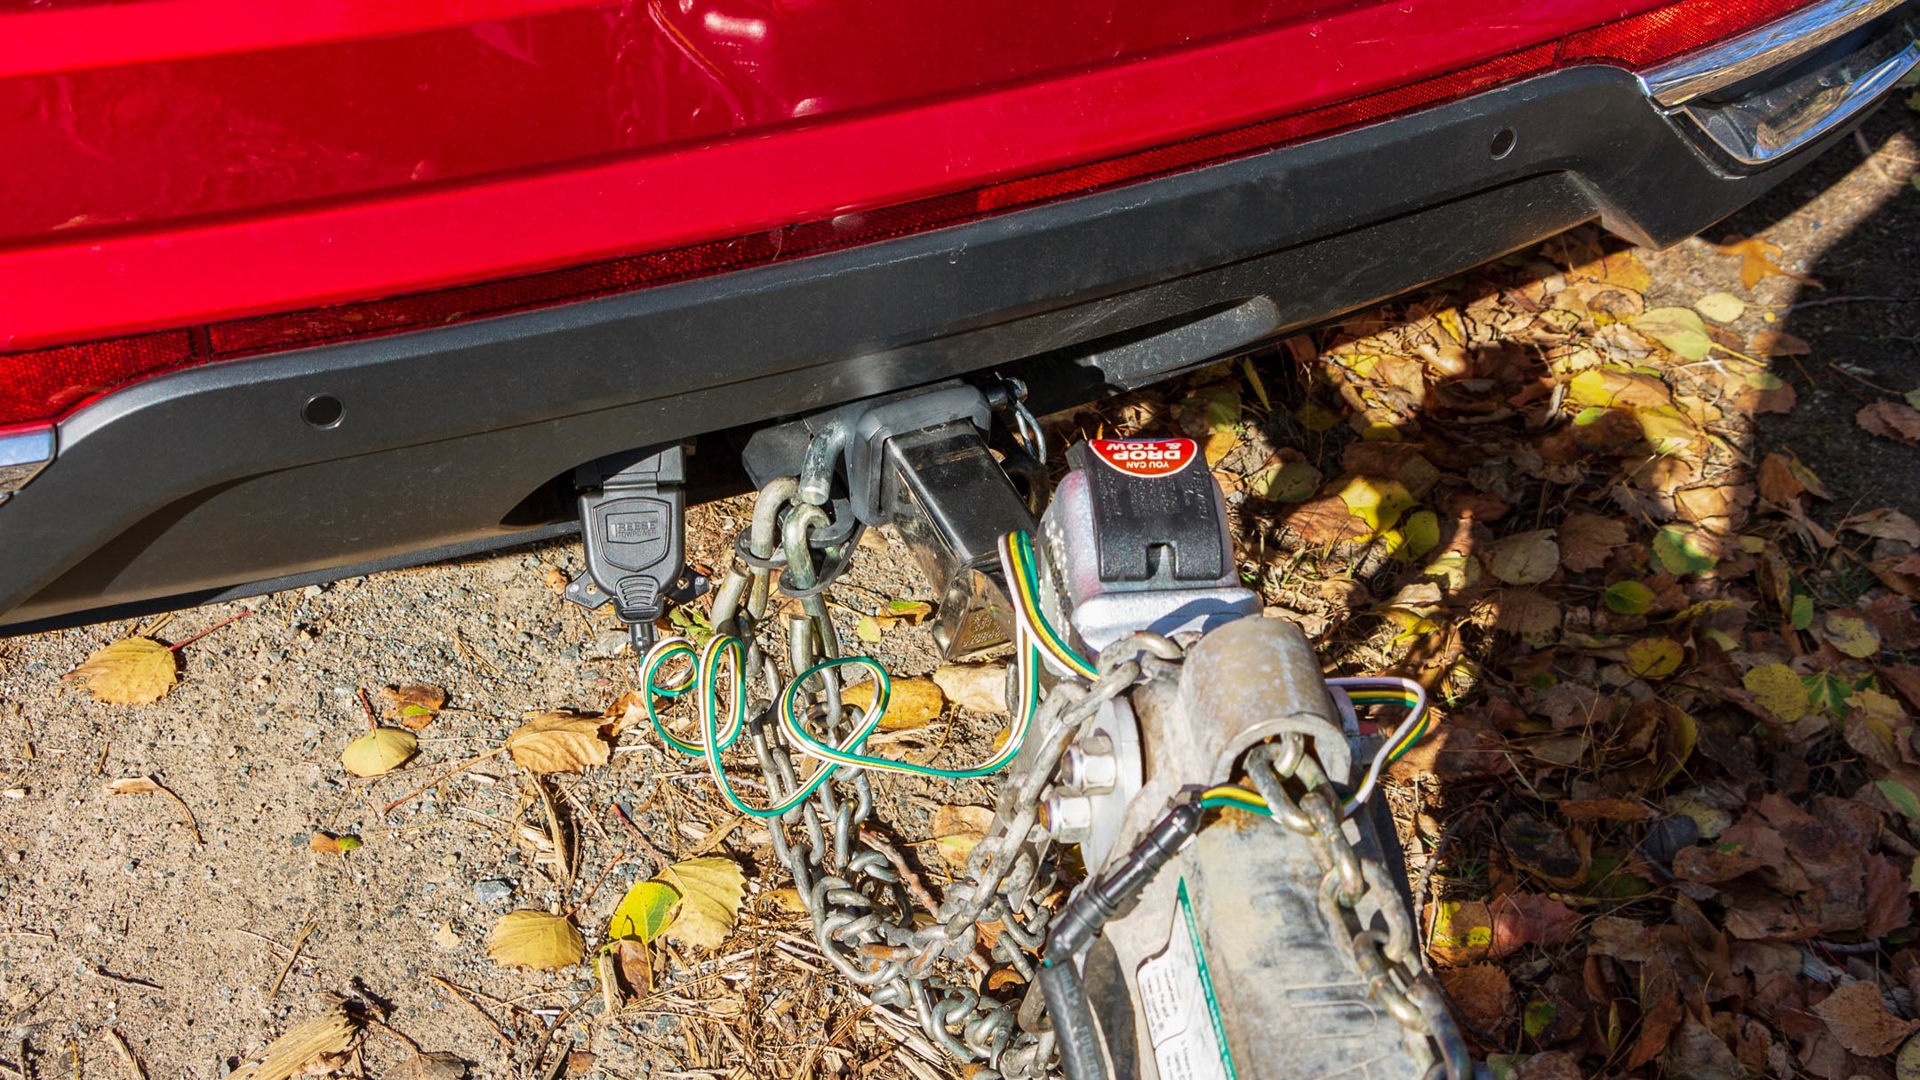
Safety chains are the last part of hookup, and there should be two on your trailer. The chains need to cross over underneath the tongue of the trailer, then hook into the slots on your hitch receiver. The crossover lets them catch the nose of the trailer if it comes unhooked, and the chains themselves stop it from getting away in that situation. The chains shouldn’t be tight, or you won’t be able to turn properly, but they shouldn’t be loose enough to touch the ground either.
So you’re all hooked up, and if you’ve gotten a rental, they’ve probably done most of that work for you. Make sure all your lights are working, which you may need a shiny storefront reflection or a friend to help confirm. Now, since you planned ahead, you already have a coffee and won’t accidentally try to use the drive-thru, and it’s time to pick up your cargo.

On the Road
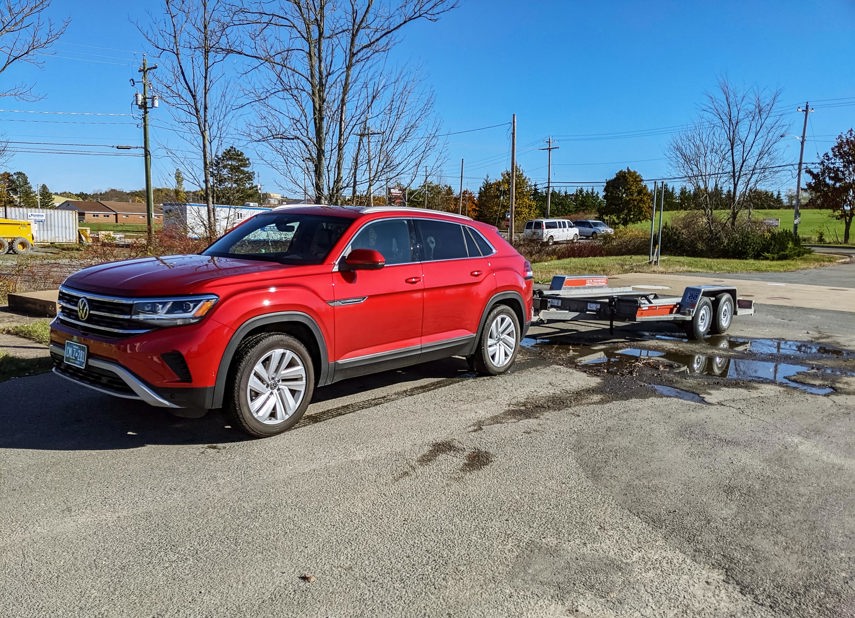
With an empty trailer, I found it easy to get overconfident. You can’t really see it, and you can’t really feel it, but it’s back there. Always. Lurking. So it’s back to planning ahead, and this time that means longer following distances, longer gaps to pull into traffic, and more space for lane changes. Those first two are critical with a load because your whole rig will take longer to stop and longer to go. And for the first few times, you won’t know exactly how much longer.
You don’t want to have to slam on the brakes because it can make the trailer unstable, and you don’t want to yank the trailer pulling away because that’s not good for your cargo, car, or neck. That all goes double when loaded because of the extra weight.
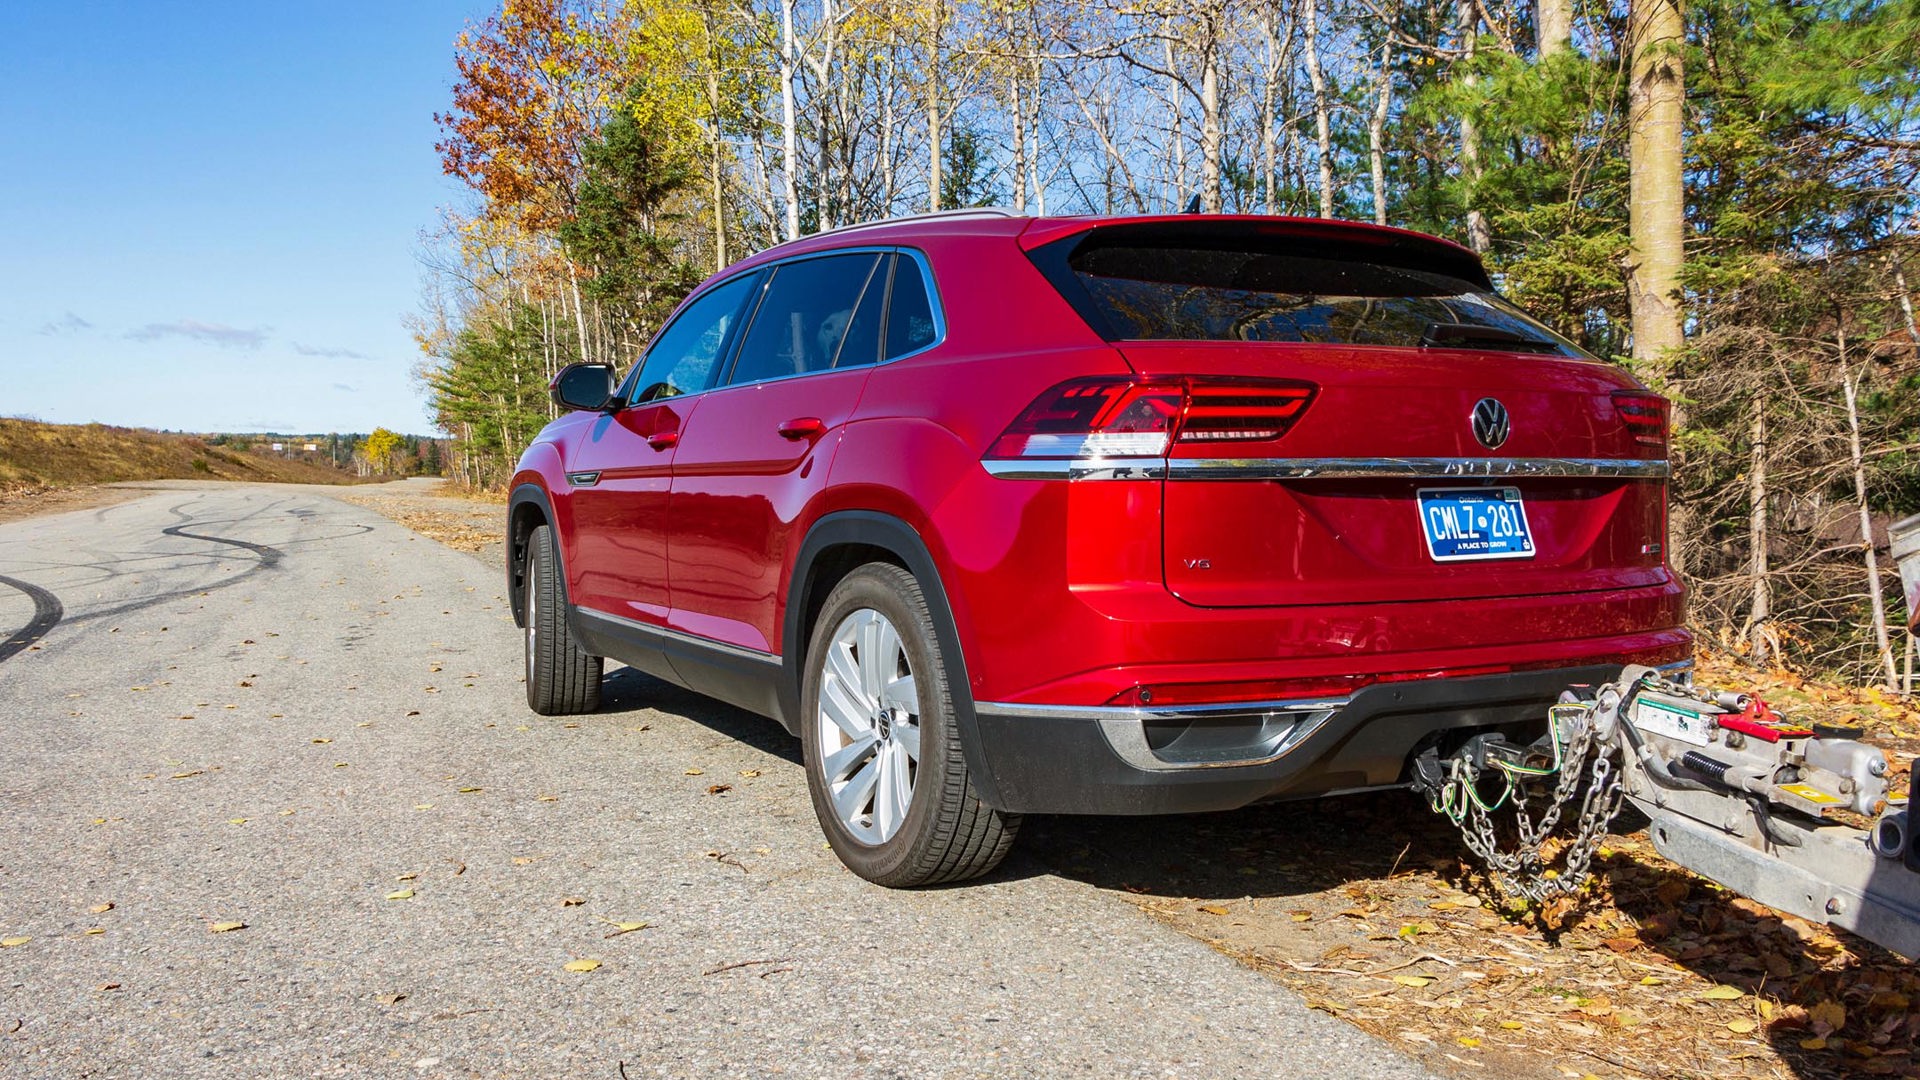
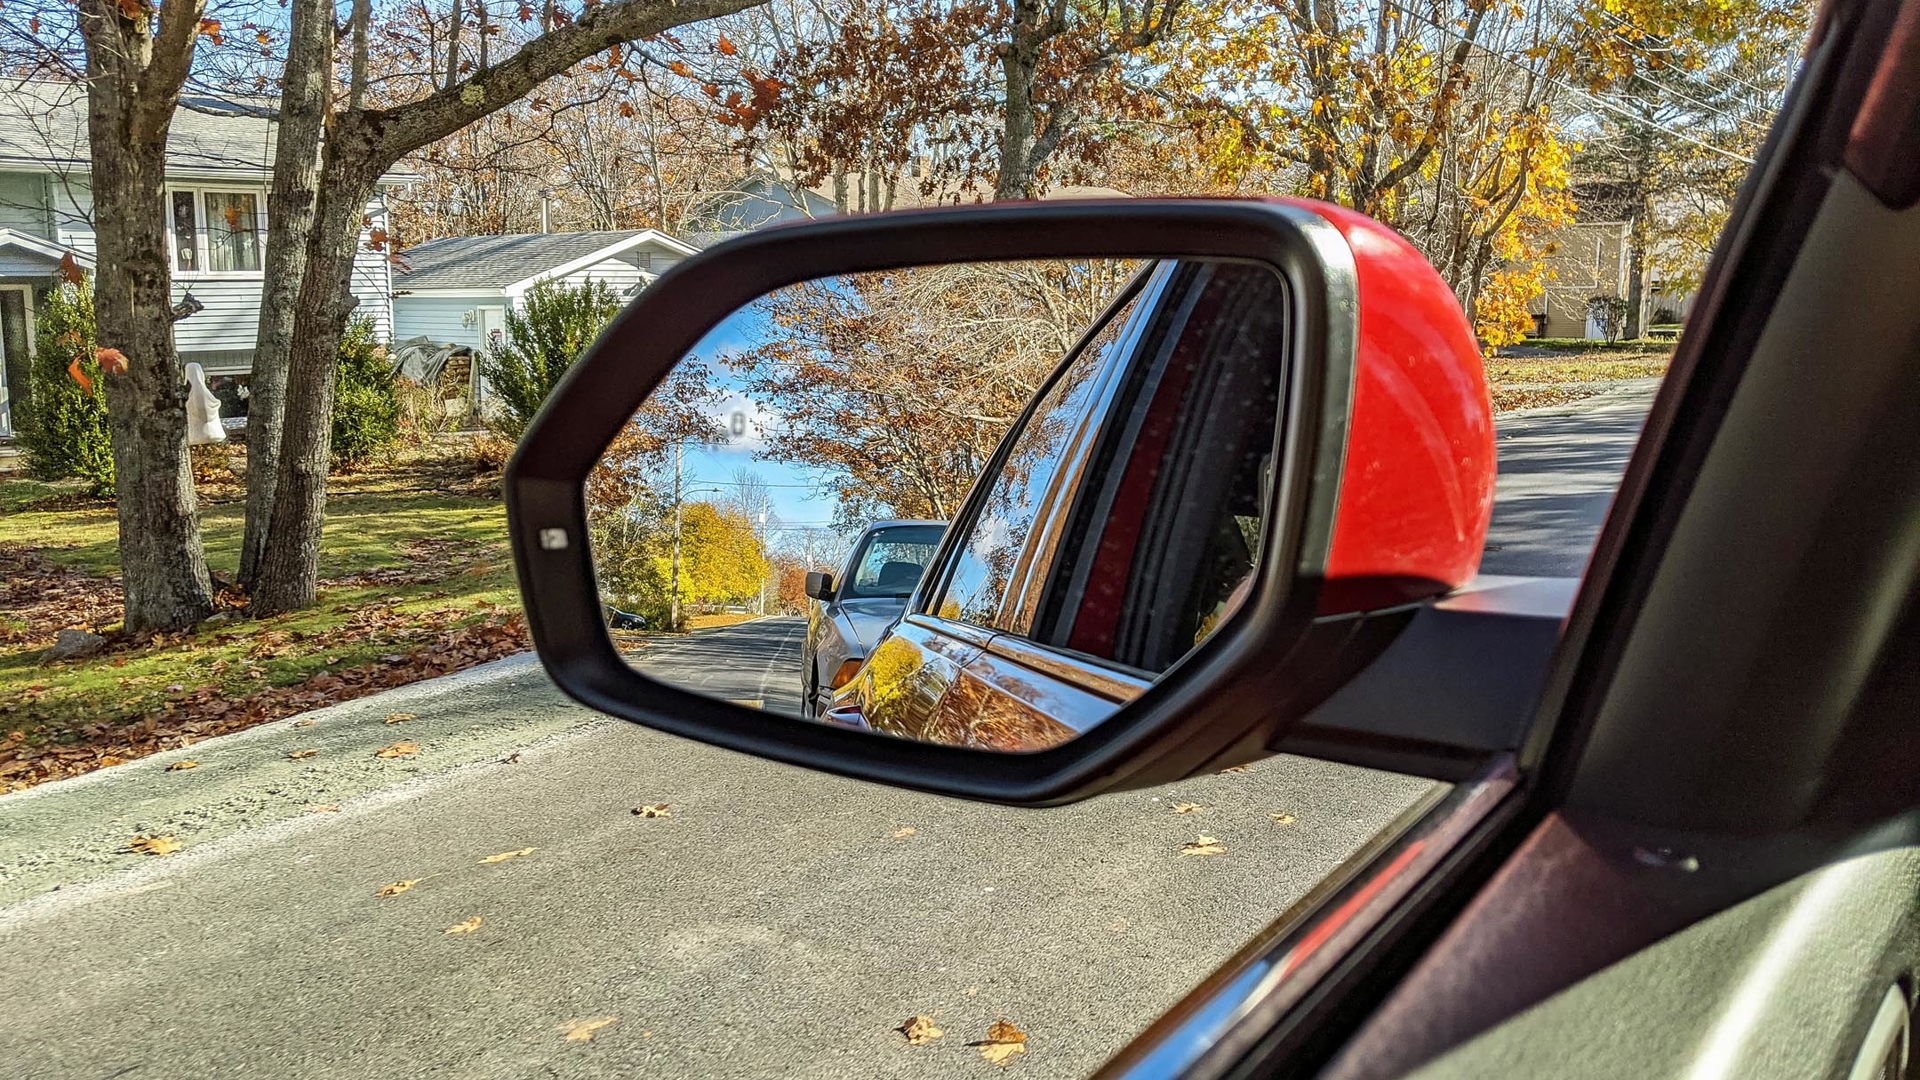
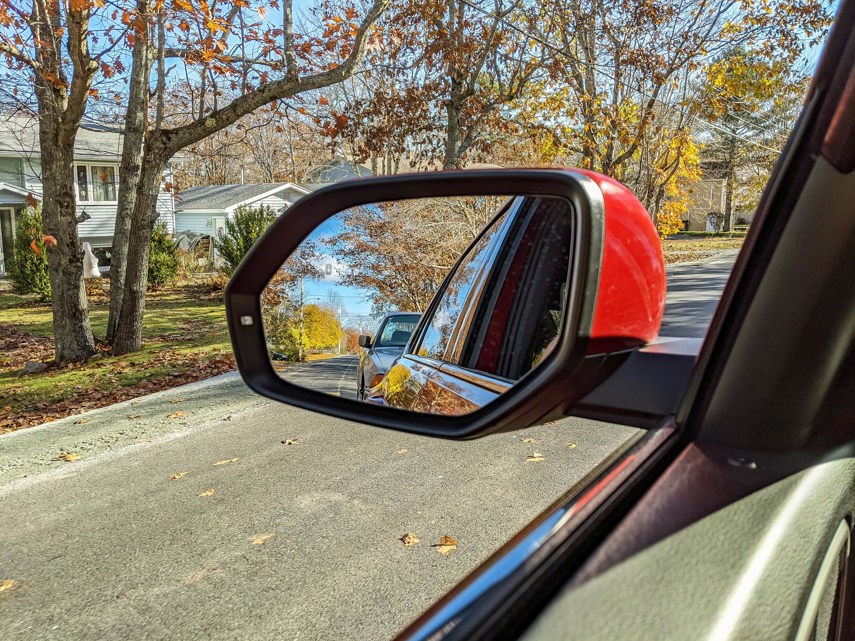
Looking up at the mirror and seeing nothing but a grille in the back window will always be a bit of a shock for me, but you’ll probably get used to it soon enough and spend more time on the side mirrors. Planning ahead means reading the owner’s manual, and that will let you know if you need to use a special drive mode, like a trailer mode, or maybe even sport mode, and all of the specifics for your ride. This Atlas Cross Sport, for example, said to keep the speeds down to 80 km/h, making my day a bit longer and me even more glad I wasn’t in a hurry.
It was a windy day, but a car on a trailer cuts through the wind well and it wasn’t an issue. If you’re hauling a large box, like an enclosed trailer or camper, you’ll probably notice some side swaying. Relaxed, gradual corrections will keep you on the road, but if you’re having a little trouble – just slow down. Don’t brake if it’s swaying, just ease off the gas and slow down. If you’re having a lot of trouble keeping the trailer on the road, pull over and have a break, before you have a break.
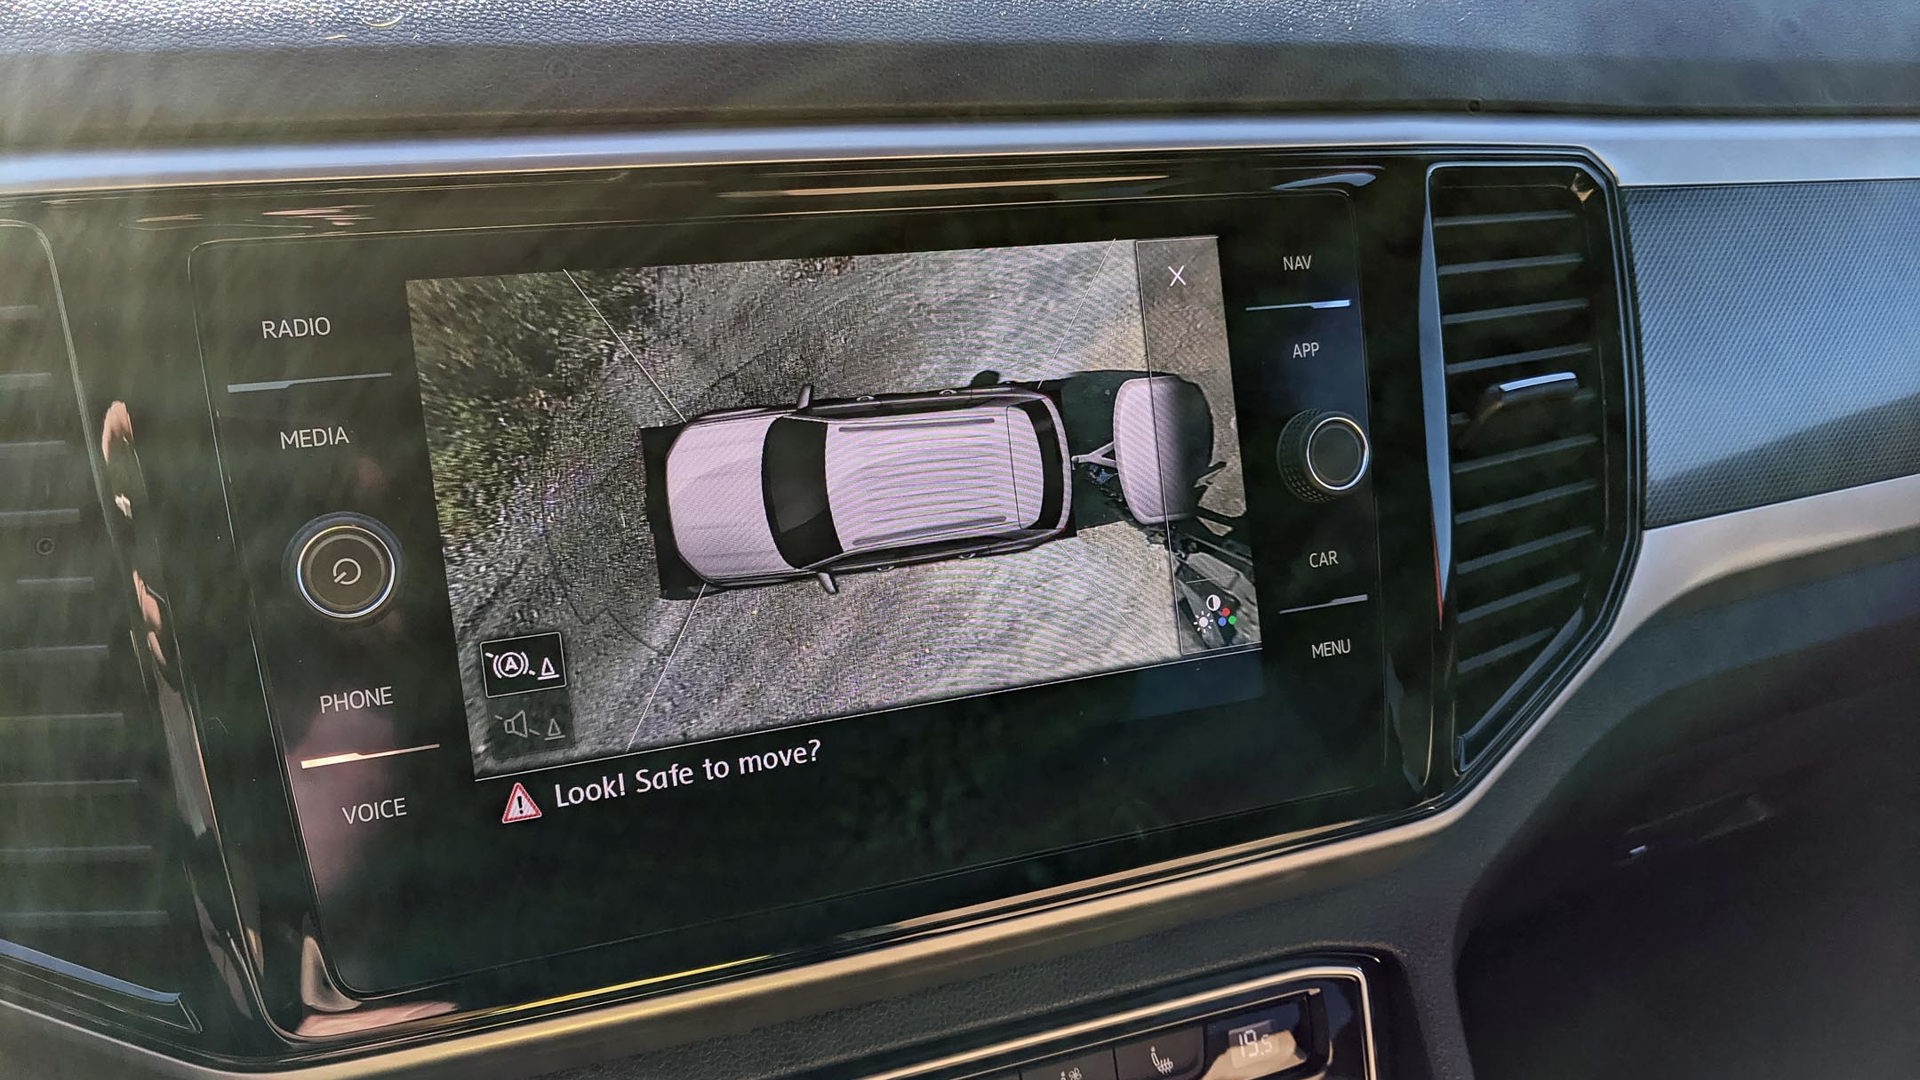
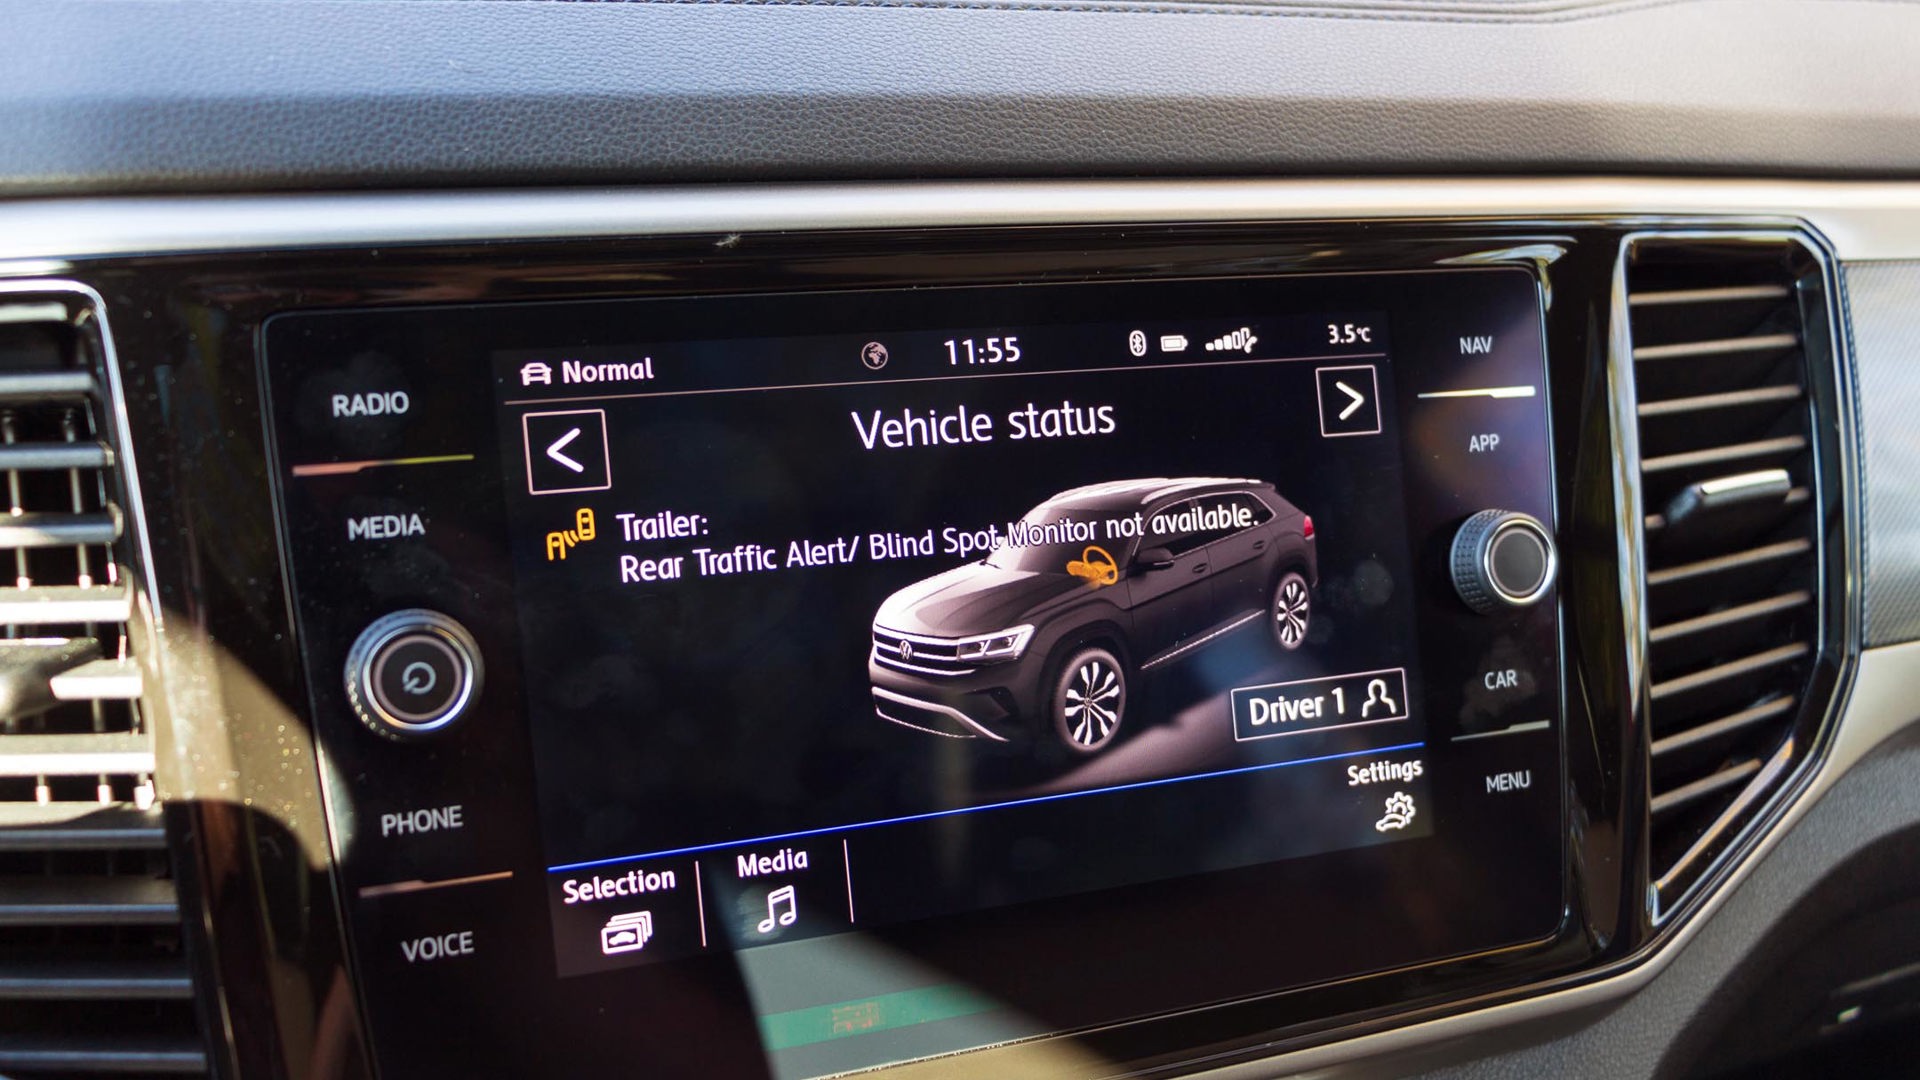
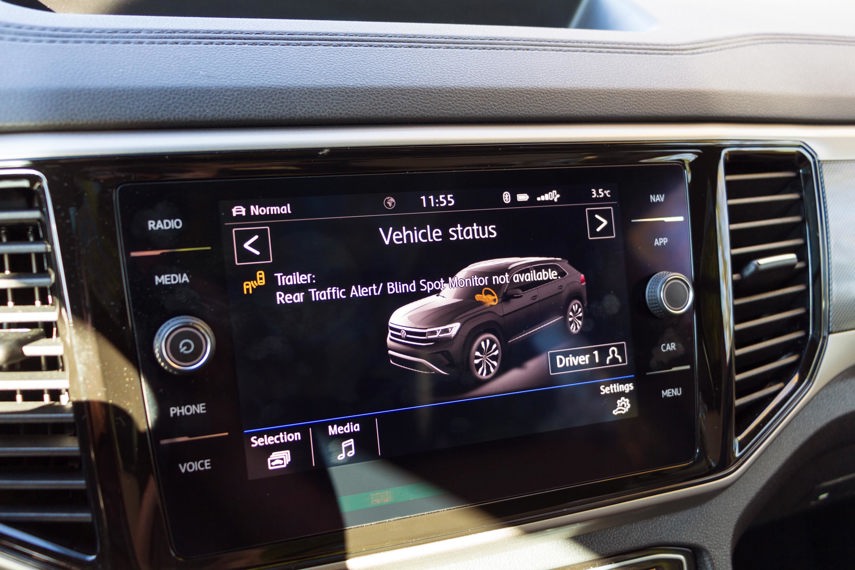
Some crossovers, like this Atlas Cross Sport, automatically detect a trailer and turns off blind spot monitoring, rear parking sensors, and even the start-stop system. The first two are great because the parking sensors would go off all the time, and your blind spot is a whole lot longer than you’re used to so that one’s largely useless. The third is for durability, because starting the engine and suddenly yanking on a trailer isn’t great for your vehicle.
If you’re used to adaptive cruise control, you’re not going to want to use it with a trailer. Unless you’re hauling something very small, even with those trailer brakes you’re going to need more distance to slow down and stop, and your adaptive cruise might not handle the changes well. Don’t tailgate, again because you’ll want more time to slow down. With a tall trailer, or something large on it like a fridge, you won’t be able to see out of your centre mirror.
When you’re turning, make sure you take it wide like a big rig. Watch the mirror that’s inside the corner because the trailer will turn well inside your vehicle putting you into the curb, off the road, or even clipping a pedestrian. Try and turn too tightly, and you can even crash into your own trailer. You don’t want to do that, and you really don’t want to tell anyone you did that.
Back It Up

Now, backing up. The part everyone dreads. You might be able to avoid most of it, but you’ll probably have to do some. It’s not as difficult as you might fear, and here are some tips to make things easier.
My first tip is to avoid it in the first place by planning ahead (I always try to avoid reversing, even with a car in a parking lot), but if that doesn’t work, then use your thumbs.
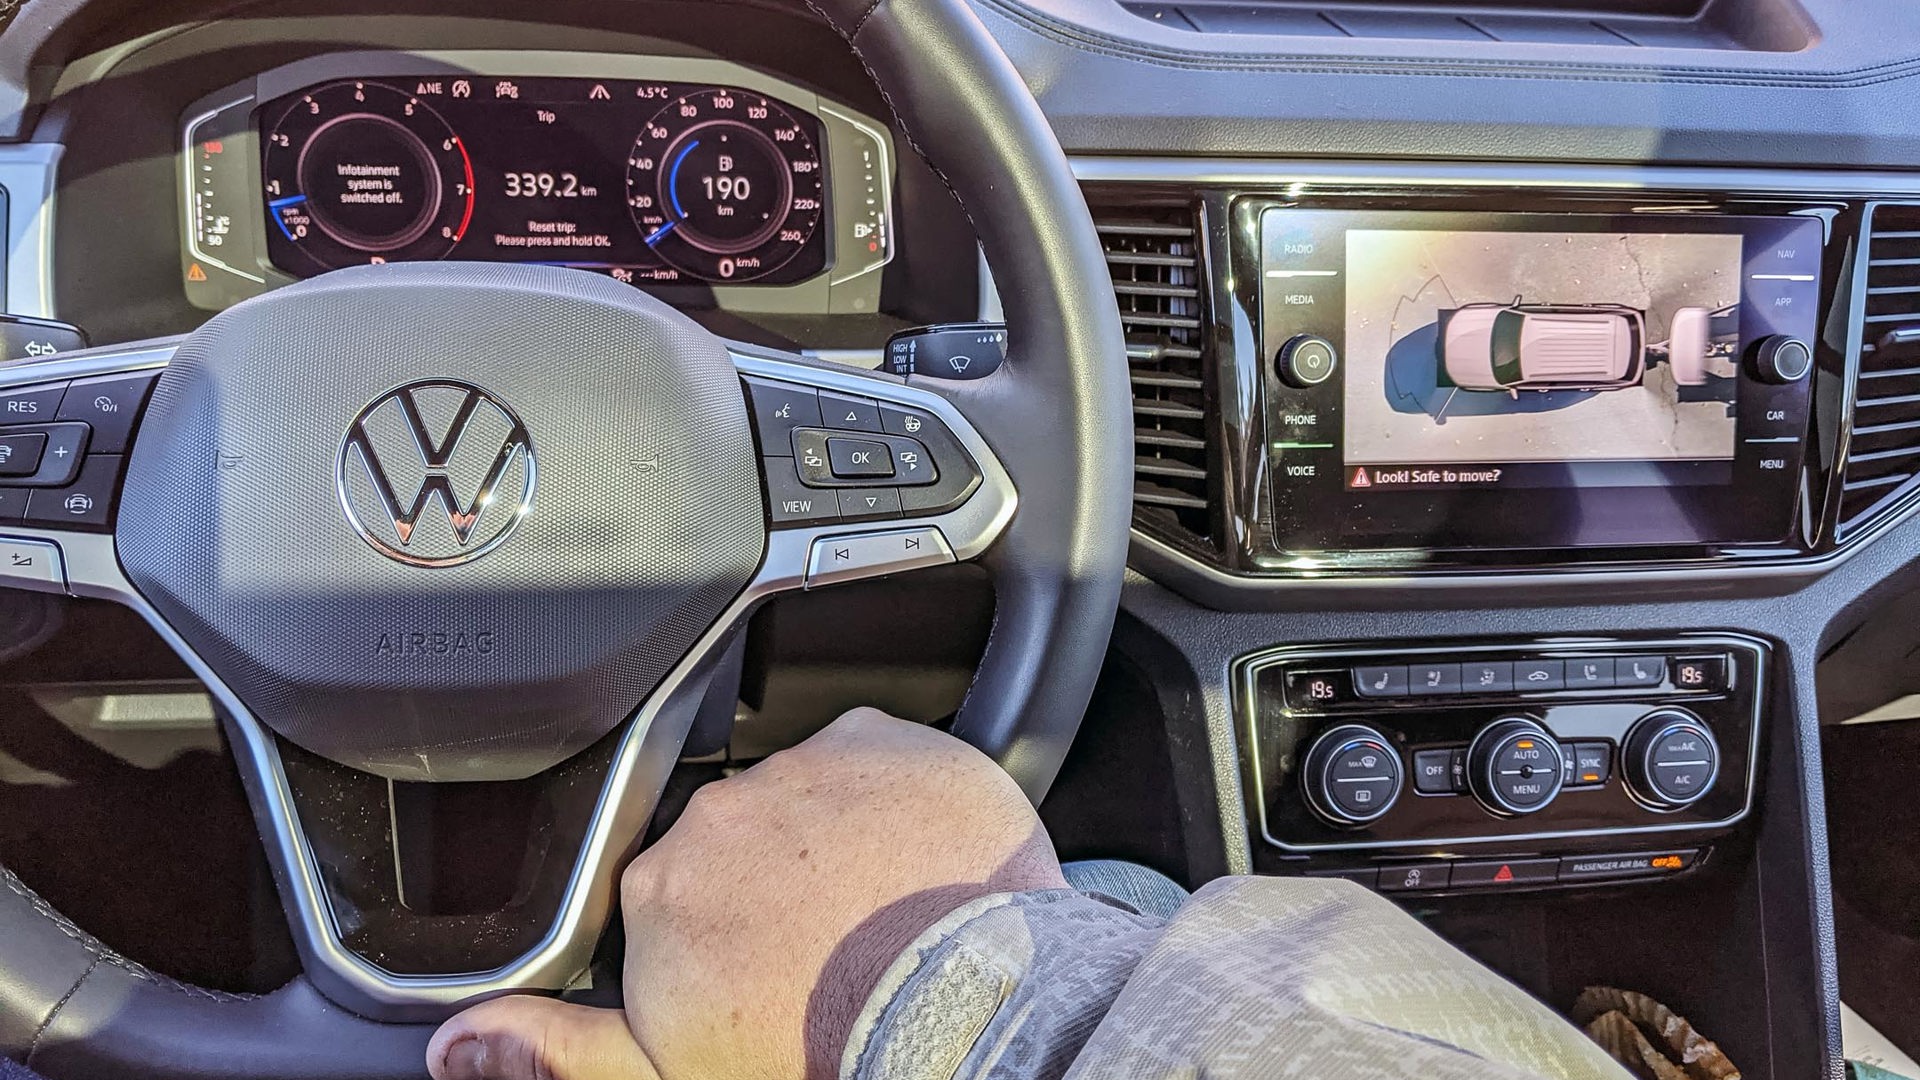
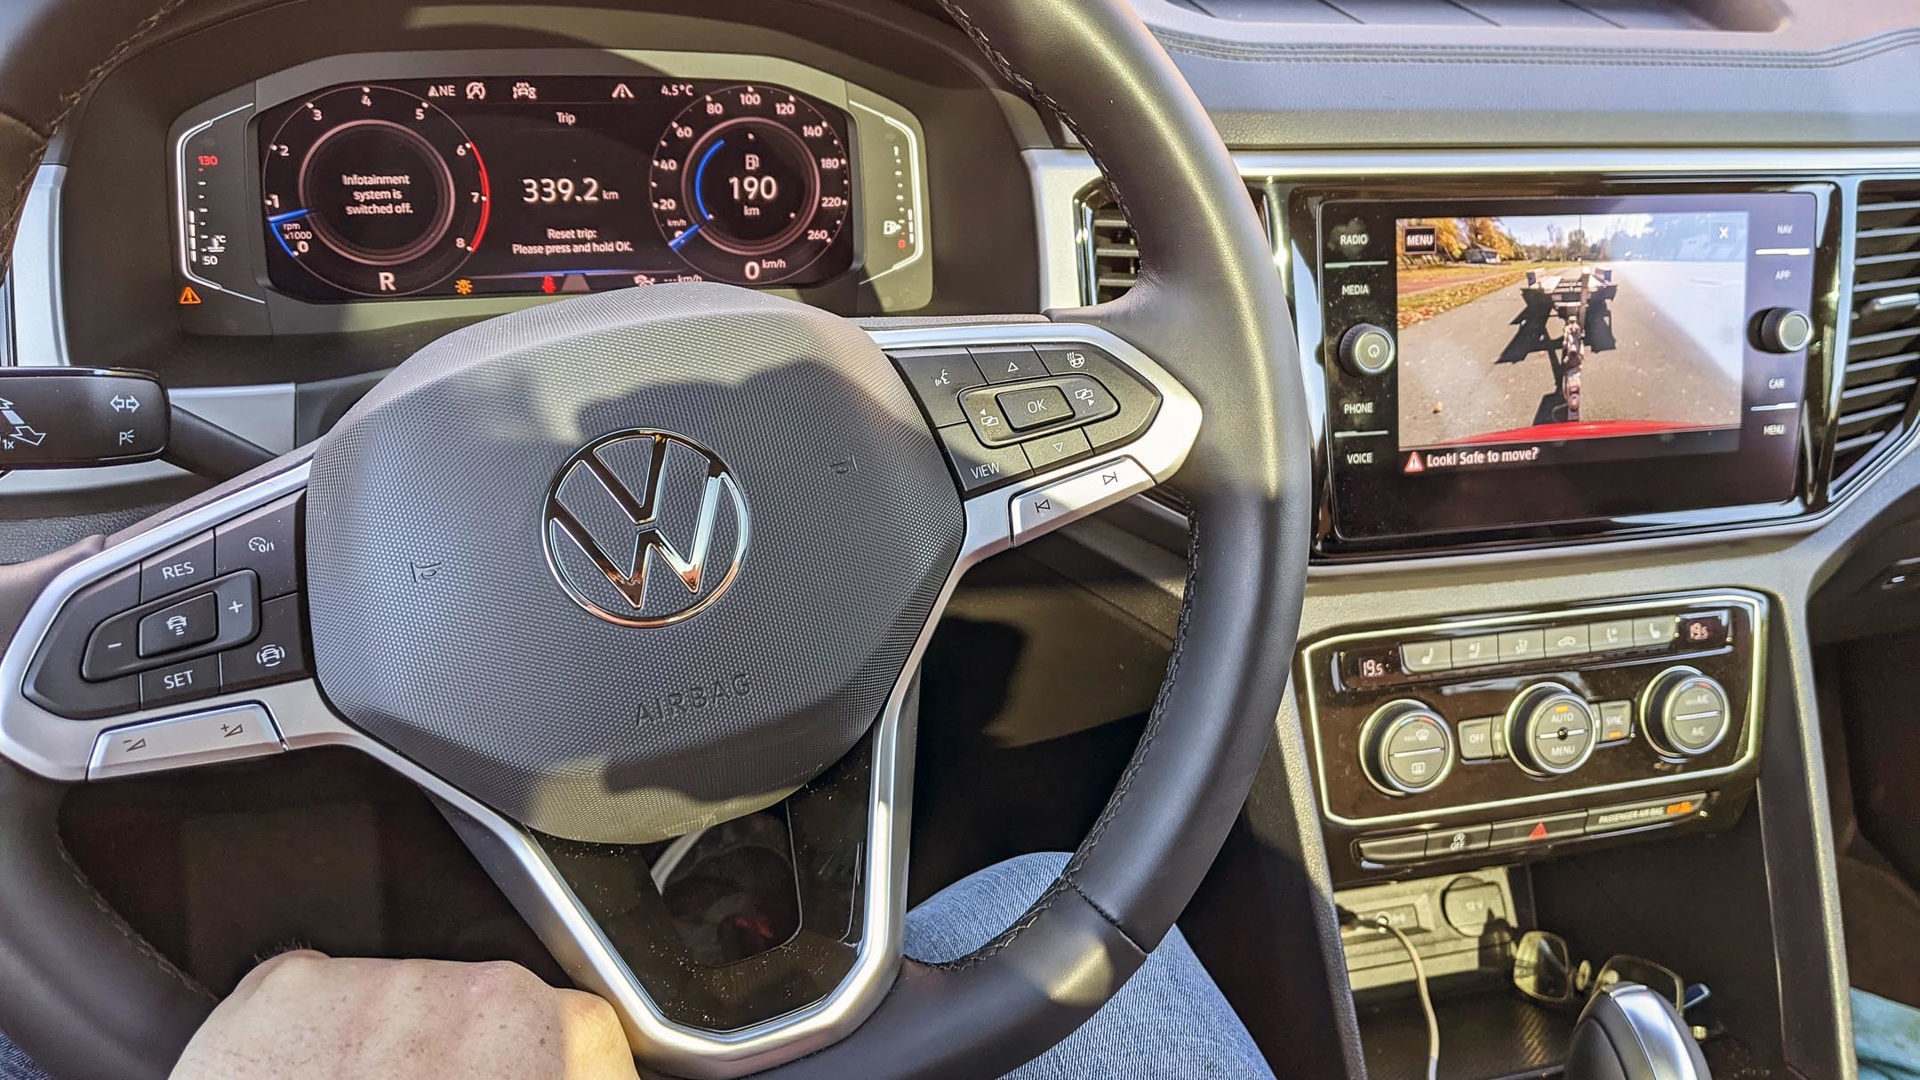
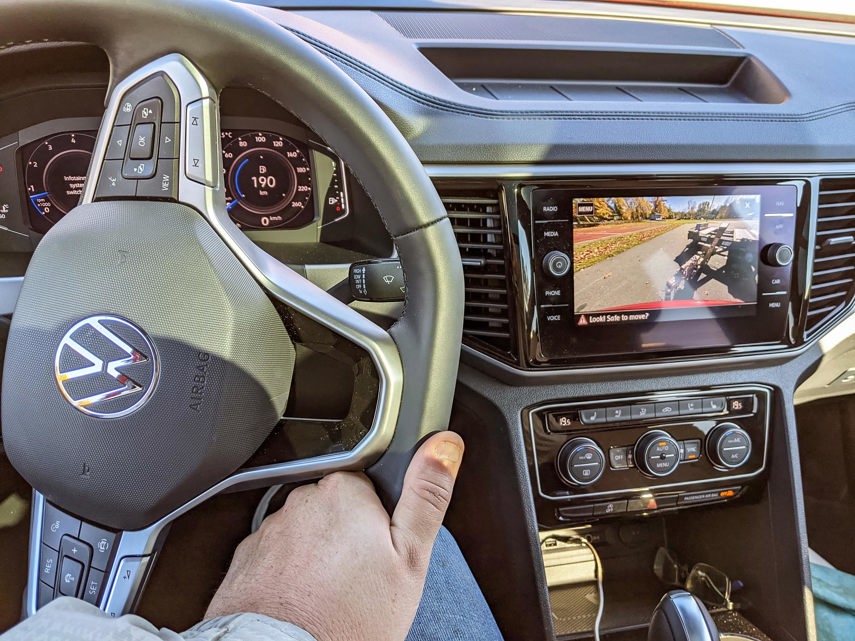
No, really. If you want your trailer to reverse in one direction put your open hand on the bottom of the steering wheel with your thumb pointed that way. Then turn the wheel the way your thumb is pointing; the back of your vehicle will go the opposite way and that will angle the trailer in the direction you want to go. Don’t crank the wheel too far, or you might jackknife (and get in a tangle). Once the trailer is pointed where you want, straighten the wheel.
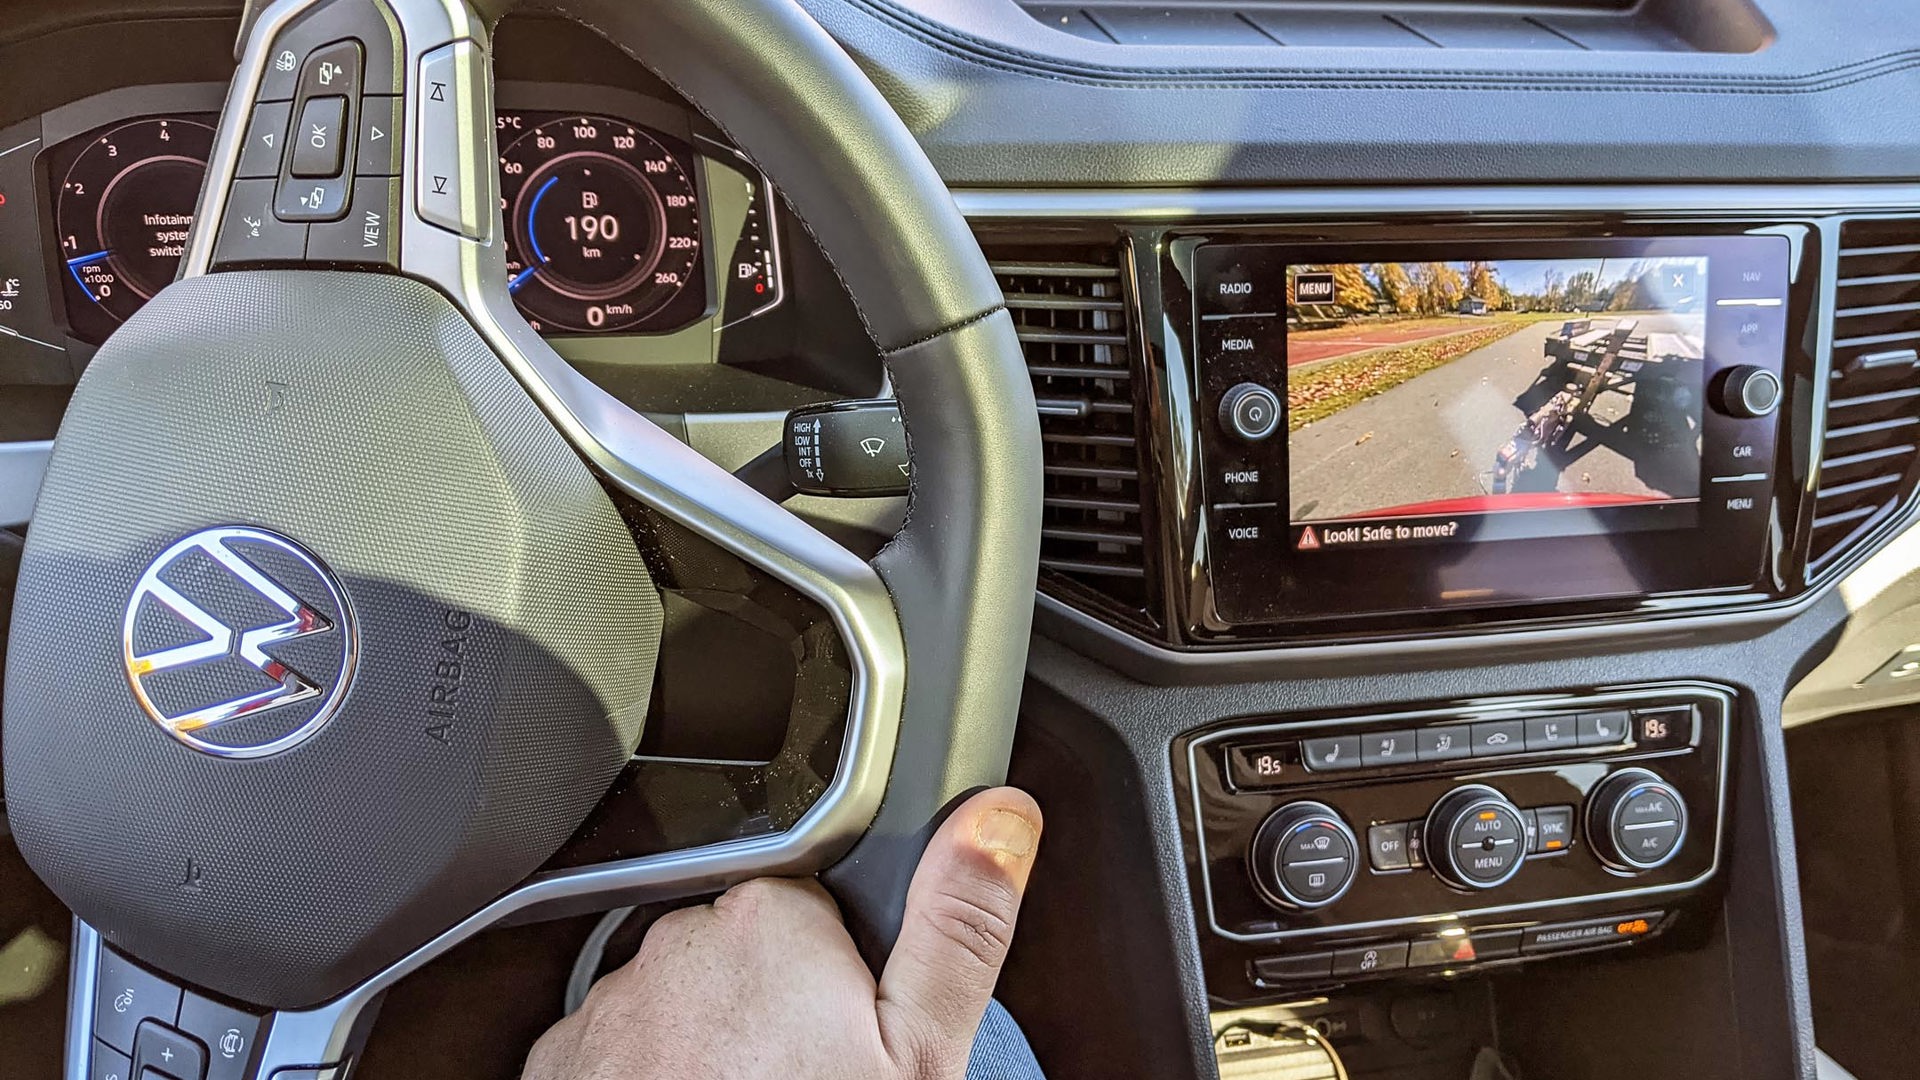
In the picture above, my thumb is pointed left. When I turn the wheel in the direction of my thumb, the rear of the vehicle will head to the right, but the tail of the trailer will be turned to the left and will go in that direction as I reverse. In the picture below, my thumb is pointed right and I am in the middle of executing the turn. Thanks to the back-up camera, I can see the angle of the trailer relative to the rear of the vehicle. I don't want to angle the trailer too much, or the trailer may jackknife, that is, pull up alongside the vehicle as I reverse.
Put another way, reverse in the opposite direction than usual to point your trailer towards your intended target, then straighten the wheel to push the trailer into position.
Second, use the cameras if you have them, and definitely use your mirrors. Be patient, relax, and if you turn your combination into a pretzel, just drive forward until it’s straight and try again. Relax, take a breath, and have another go. If your passenger is as stressed as you are, it’s a good time for them to get out and go for a walk. Far away.
That’s all there is to the driving part. One less excuse for not getting that weekend project done, not getting out into nature with that four-wheeler you’ve always wanted, or for avoiding paying big bucks for delivery. You can do it yourself. We won’t tell you that you’ll never notice the trailer back there, because that’s a lie. But don’t stress. All you need to do is plan ahead and take things slow.
Required Reading
Now the technical bits, though most of these are a one-time worry, the first time you tow.
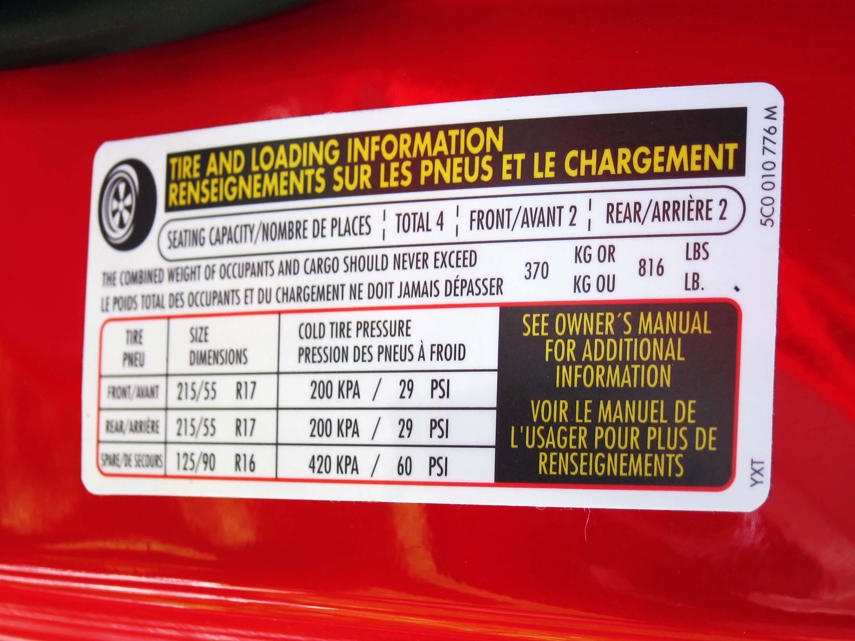
We already said to read the manual, but it is essential. Because that (along with a sticker on the door [The below picture is for illustration and not taken from the Volkswagen Atlas Cross Sport. –Ed.]) is where you’ll get the information you’ll need to find your crossover’s towing limits.
The Trailering or Trailer Towing section of the manual should tell you how heavy of a trailer you can handle. You’ll need to know which engine you have, and possibly the option packages, but the info you need should be in here.
Important figures include Gross Vehicle Weight Rating (GVWR the most your vehicle can safely weigh and that includes the crossover itself, your passengers, your in-car cargo, fuel, and the weight of the tongue of the trailer). Never go over that weight. Gross Combined Weight Rating, or GCWR, is the sum of your vehicle, everything in it, and the weight of the trailer. Do not exceed this.
Simply put, If your vehicle’s GVWR is 1,000 kg over its empty weight, it can support 1,000 kg of cargo. Add 1,000 kg of cargo and passengers, and you won’t be able to tow a trailer at all. Or, add a trailer that is equal to your crossover maximum tow capacity and you may not be able to bring any cargo inside, including passengers. Your manual should give you all the numbers you need, and help with the math.
Loading your trailer, you want about 10 per cent of the weight on the tongue. That means loading your cargo ahead of the axle, and in the case of this car, going engine first. You’ll need to estimate since you don’t have a scale, but the people helping you load at the store likely know what they’re doing.
The Hardware
Hitch Receiver
Next up, you’ll need a trailer hitch receiver, the hitch. Your crossover may have come with one from the factory, otherwise, you’ll need to buy one. Factory or dealer hitches often fit more discreetly under your bumper, but they also come at an increased cost. If you’re looking at a brand-new vehicle, we would recommend any factory towing packages if they are available, as they usually come with extra cooling for your engine and transmission oils, and may offer some extra electronic towing convenience features.
Hitch receivers are sold by “Class” which is a guide to how much the hitch can safely tow. Class 1 is rated for up to 2,000 lb (907 kg), Class 2 up to 3,500 lb (1,588 kg). Both have a 1 1/4" square hole called the receiver that’s meant to hold the ball mount. The receiver is the hole you see when you’re behind a vehicle with a hitch. Class 3 and 4 are two-inch square and can handle up to 8,000 lb (3,629 kg) and 10,000 lb (4,536 kg) respectively. Your crossover likely will use Class 1, 2, or 3, but whichever you choose, your trailer weight is still limited to whichever is lower between the vehicle rating and the hitch rating.
Wiring
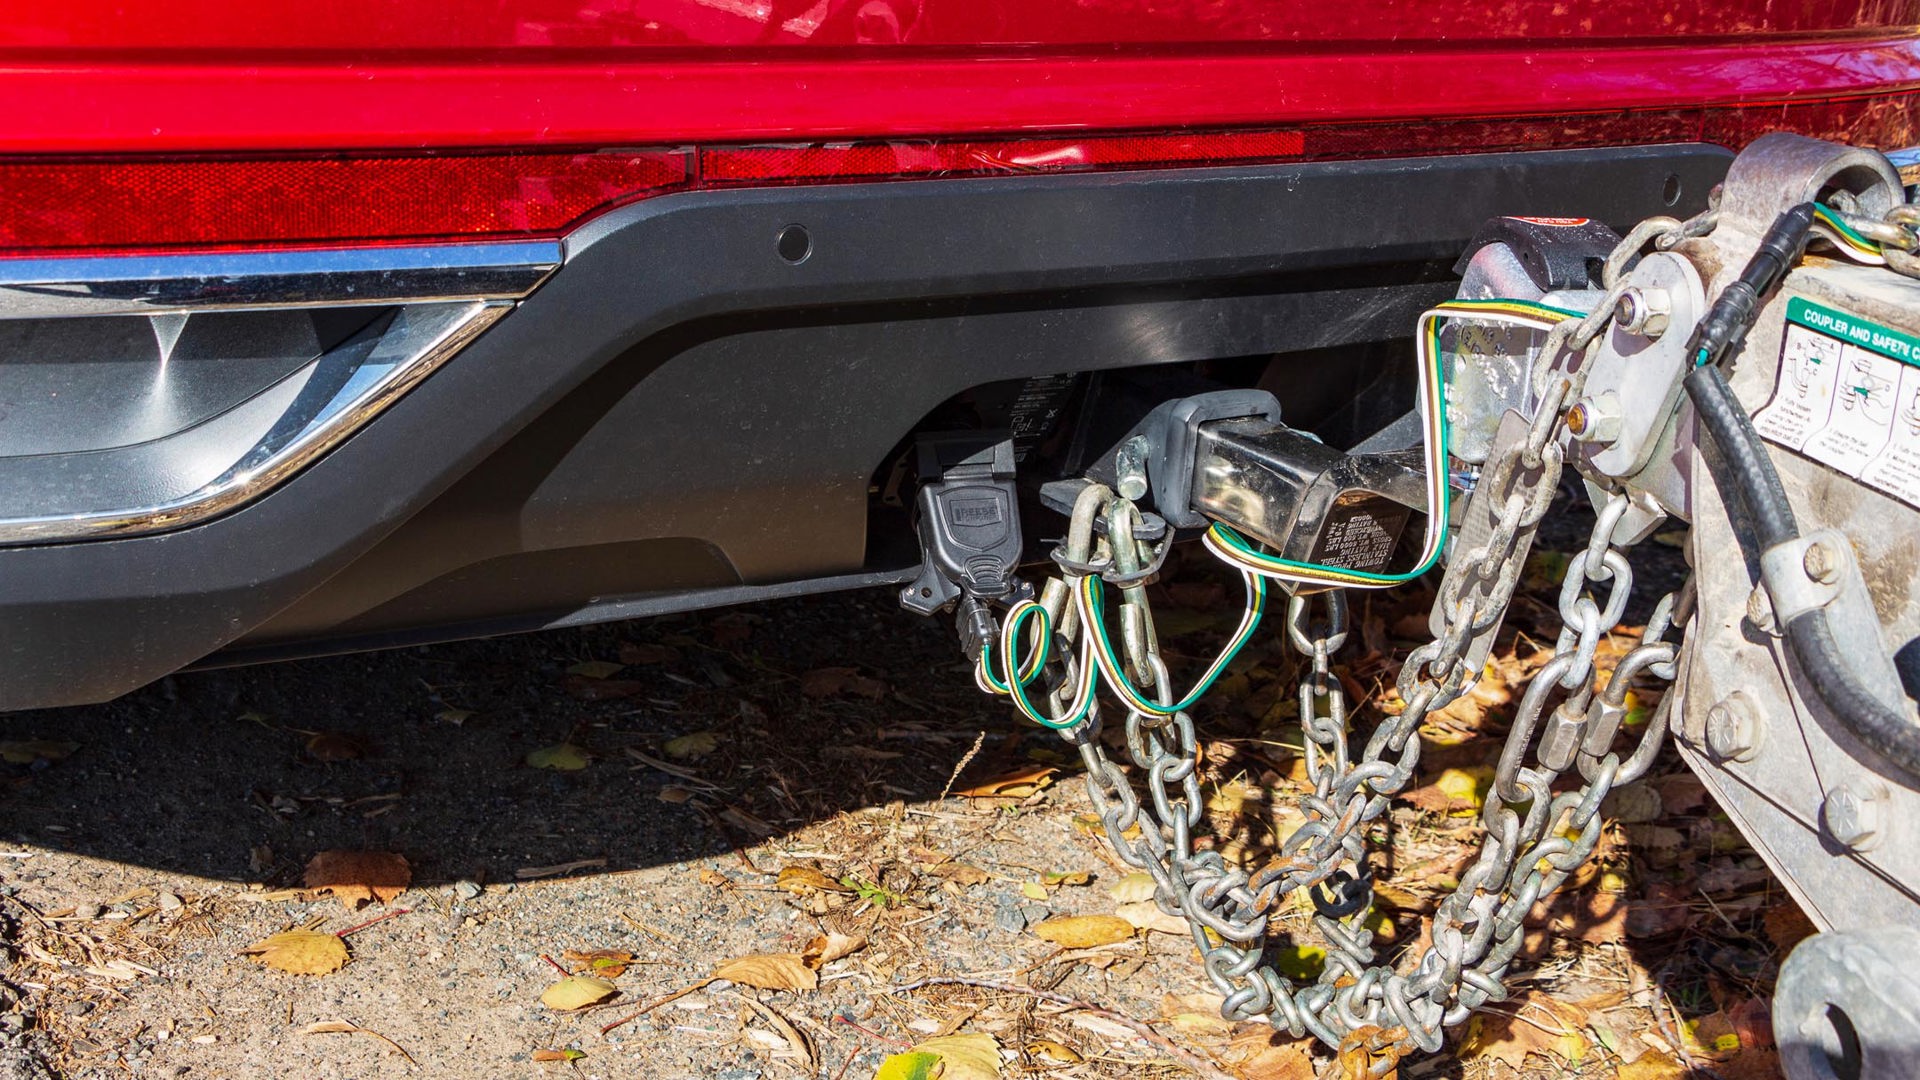
Now it’s time for some wiring, and this is where you’ll probably wish you had gotten the factory tow package. Some vehicles have a wiring harness ready to plug in for the trailer, but if not you’ll need an adapter that borrows the signal from your vehicle’s rear lights. Because many of these require cutting into factory wires, and because factory wiring isn’t always just boring ol’ 12V power like it used to be, this part is best left for an expert. It’s a one-time thing, though, so it's probably worth the expense.
Some crossovers, like this Volkswagen Atlas Cross Sport, have almost the right plug, but not quite, so a different plug is needed to connect the factory wiring to the trailer plug. Any trailer store should be able to help you find the right part for your vehicle, and it’s not an expensive piece in most situations.
Brakes
Most vehicles (and provinces) require separate trailer brakes if your loaded trailer is above a certain weight. While provincial rules might be much higher, most crossovers say your trailer needs brakes if it’s over about 200 kg loaded. If you’re buying your own trailer, it probably has electric brakes, and that means you need a brake controller. This is a device that hooks into your wiring system and tells the trailer how hard to brake based on how hard you’re trying to stop. Some, like this Atlas, have a harness hidden away in the cabin for a convenient plug-in. It’s not listed in the manual, but you might find the information in a vehicle-specific forum. You’ll want professional installation and to thoroughly read the instruction manual because these controllers can work very differently and need to be set up to your trailer. There are also Bluetooth-enabled controllers so you can spend a bit more to use your phone and not need any extra wiring.
If you’re not buying your own trailer, and for occasional hauling a rental is likely a far more convenient and economical choice, the largest provider of rental trailers in the country has trailers equipped with surge brakes. That’s a self-contained system that doesn’t need a brake controller installed in the vehicle, making that one less thing you need to worry about.
Hitch Ball and Ball Mount
The last thing you’ll need now is a ball mount and the hitch ball. The ball mount is the piece that sticks out of the back of your vehicle and usually bends up or down to help make the trailer level. If your vehicle is very high or very low then you might need a larger drop or rise (how much lower or higher the ball is than the receiver), and you should check with your trailer store or rental location to find the right height for your vehicle. You could also get an adjustable mount that will go up and down, but they are significantly more expensive.
Hitch balls are commonly 1 7/8" for small trailers or 2" for larger ones (there are bigger sizes for even heavier trailers), but a second ball to make sure you have both sizes isn’t much of an extra cost. You’ll need a large wrench, likely 1 1/2", to tighten or loosen the nut holding the ball in place, and you should always make sure the nut is tightened because you never want it to come loose on the road.
Remove the ball mount whenever you aren’t towing, unless you hate your shins, and make sure the receiver is clean of debris. Put a plastic cap in place when the ball mount isn’t installed because rust inside the receiver can cause the ball mount to either stick or not go in at all. Likewise, leaving the ball mount in place for months on end can rust it solid to your hitch on top of getting in the way.
That’s it, you’re ready. Take a deep breath, take it easy, and take that big load home.
